To see any picture on this page in a larger size, click on that picture.
Assembly
 The goals are stored in long canvas bags and will be located at each end of the field. The goal for 8U and younger consists of 5 crossbars, 1 crossbar with an attached connector, 4 corners, 1 net, at least 6 goal stakes, and 1 hammer. The 10U goal has 7 crossbars and 2 separate connectors. For all divisions, each bag should also contain 2 corner flags. If any pieces are missing, please see someone at the Snack Shack.
 For the top crossbar:
7U/8U – connect the crossbar with the threaded net to the remaining crossbar;
10U – using the 2 separate connectors, connect 3 crossbars (the one with the threaded net should be in the middle).

Put a corner on each end and attach another crossbar down each side. You should now have a squared off U shape.
 Attach a corner to each side so that it points up into the air. Get the remaining 2 crossbars and attach one to each corner. Presto, you have an assembled goal. However, it still might be a little difficult to use, since it is laying on the ground.
Placement and Securing the Goal
 With the goal still on the ground, lift/drag it into position. The goal needs to be placed in the middle of the goal area. Do this by pacing off the distance between the uprights and the goal area lines. As you are standing up the goal, have your partner spread the net across the crossbars, down the uprights and to the end of the ground support bars.
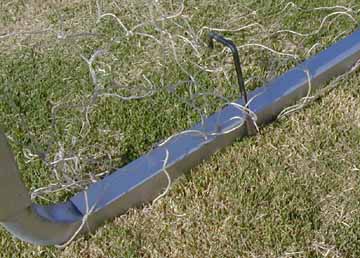
 When the goal is standing, make sure the uprights are directly above the goal line. When it is in the correct position, have your partner stake both ground support bars at the open end. Be sure to stake the net to the ground support bar.
 Using at least 2, and preferably 3 stakes, stretch the net back, and stake it down.
Check the Goal and Place the Flags
After the goal is up, take the corner flags and place them in the very outside corners of the field. Drag the goal bag back behind the goal, and put all the remaining items (this should only be the hammer) inside the bag. Now, go back and check each stake to make sure it is pounded all the way down. One of the leading causes of injury is having the goal fall on one of the players. When you are satisfied, pat each other on the back, go sit down, and enjoy the game.
Disassembly
The teams playing the last game of the day get to tear them down.
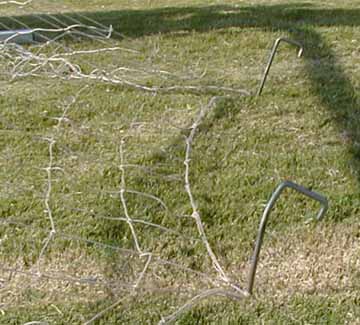
 Have one person hold the goal upright while another pulls out all the stakes. While you are laying the goal down, PUSH THE THREADED PART OF THE NET UP EACH UPRIGHT, AROUND THE CORNER AND TO THE CENTER CROSSBAR. This one small act will save 10 minutes when setting up the goal the next time. With the goal on the ground, disassemble, leaving the net on the center crossbar. Roll the net around the crossbar and place it in the bag. Place all remaining parts, including corner flags, stakes, and hammer, in the bag.